Showing posts with label tomatoes. Show all posts

Wednesday, July 11, 2012

what's corny and cheesy and delicious all over?


There are many blessings found in living in a small town.  This week, that blessing was fresh-picked-from-the-garden corn.  Last night, I used some of it in a simple pasta with shrimp, tomatoes and white wine.  Tonight, I decided to take those same veggies and make something entirely different: roasted veggie enchiladas!  I think this is because it was raining.  We Texans like to make enchiladas when it's rainy (or sunny, for that matter).

                      Get ready for a sensational seasonal supper, y'all!
Cut the corn off of two cobs (trying not to let those kernels fly all over the kitchen like confetti).  Then chop two roma tomatoes (sans seeds), 3 cloves of garlic (chopped large) and a large shallot or half an onion.  Drizzle with vegetable oil (not evoo: it has too strong a flavor for this) and season liberally with 1 T cumin, 1 t chili powder, salt and pepper to taste.

 Roast at 400ºF/204ºC for about 15 minutes.

 While those veggies are roasting, get going on your enchilada sauce.  Add enough oil (vegetable again) just to cover the bottom of a small pan (about 3 T) and go a bit crazy with the cumin.  Also add a bit of chili powder and enough flour to soak up all of the oil.

The French call this sort of sauce base a roux.  But we're making Mexican, we'll just call it deliciosa.
Add in about 1 T of tomato paste, which gives it a rich color and depth of flavor.

Then add about 1 1/2 cups chicken stock.  When my family makes enchilada sauce, they just use water, which tastes great too once it thickens.  I must've been thinking of this as I made my sauce, because I seasoned it with salt and pepper without tasting it, thus making it waay too salty.  Like Atlantic Ocean salty.  *Must remember how salty chicken stock can be!*  If at first you don't succeed...

 ...try and try again.  Much better.

 Grate some cheese as that sauce thickens (again).  I just used colby jack because it's what I had, but pepper jack would add a nice kick.

Now, get your corn tortillas ready to fill with those spicy roasted veggies and mild cheese.  Unless you never outgrew that "eating paste" phase from kindergarden and like all your food to be paste-ish, only use corn tortillas.  Very fresh corn tortillas will probably roll up without tearing, but mine have been hanging in the fridge for a few weeks (they last a good long while) and so they needed a quick dip in hot oil to soften them so they wouldn't tear.

Fill each tortilla (I made eight enchiladas) with a tablespoon or so of filling and cheese.  Roll up.


Cover with that delightful sauce.  I actually strained mine through a sieve, just to be sure I got a nice smooth sauce.  Top with a bit more cheese and a sprinkling of chili powder.  If you have any filling leftover, put that across the top as well.

Cover with foil so they don't dry out, and bake for 15 minutes at 400ºF/176ºC.  Uncover and cook 5 minutes more.

Here you have it!  Top with cilantro, or if cilantro is as appealing to you as kindergarten paste, chopped scallions will do.

 Absolutely deliciosa.  Full of flavor and very satisfying.

Poor Hayden didn't even get one bite.

Bon appetit!
Lilrevchef

Wednesday, November 9, 2011

the best thing to come out of toaster oven since sliced bread


Doozy of a blog post title, huh?  But I was very pleased with how delicious this eggplant parmesan recipe from my friend Lynn was.  And even more pleased that I was able to pull it off in a toaster oven.  I know, you're wondering why on earth lilrevchef would put eggplant in a toaster oven (I might just be the first person to have ever done that).  Well, it seems that, to put it in Texan vernacular, I done gone cooked my oven to death, y'all.  I was making a batch of those scrumptious snickerdoodles the other day and right as they came out of the oven, I noticed one of the elements burning really brightly.  Like welding-you-should-have-protective-eyewear brightly.  I turned off the oven and watched as it had it's own little fourth of July celebration, sending sparks flying in all directions as the element burnt out.  Not good.  It'll definitely need a new element before it's safe to use.  But, never one to let a little thing like an exploding oven to stop me from cooking, I decided to make use of my toaster oven and see just how much the latter term was really true.  It worked!  I do recommend that you make this in a regular oven.  It's funny, my friend Tad has asked for a retro recipe from the 60's and I think it would probably be trying to make this in a toaster oven, or making something in the microwave, being stunned with the amazing developments in technology!  

You'll need one, one pound eggplant/aubergine.  I halved Lynn's recipe (to make it toaster-oven adaptable and about 5 servings).

The recipe calls for whole wheat panko bread crumbs (which are wonderfully crisp Japanese breadcrumbs that are infinitely better than the sawdust that passes for regular breadcrumbs).  But I couldn't find whole wheat ones, so I just toasted up regular panko breadcrumbs making them extra crispy.  Check out that chef move tossing those breadcrumbs in the pan!  I can set ovens on fire, but I can also do other things, y'all.

I just toasted them in a dry pan on medium, shaking often until golden brown.

Peel your eggplant.  It is SO easy compared to that beastly butternut.

I sliced it in about 1/3 inch rounds, a bit thinner than the recipe called for because comments on the recipe said it made them more tender.

Add one tablespoon of water to two eggs and whisk together.

Add about 1/4 cup of parmesan to your panko breadcrumbs and stir to combine.

Dredge eggplant slices in the egg...

and then the breadcrumb mixture, pressing lightly to get the breadcrumbs to adhere and then shaking off the excess.

Bake at 375ºF/190ºC for about 30 minutes until crispy outside and tender inside.  My teeny toaster oven only let me fit about half of them, so I ended up pan-crisping the others in a little olive oil on medium heat.  And, though it might not be as healthy, those were the most tender, flavorful slices of eggplant.  Do whatever ya like.

Now we need to get some of our filling put together.  This eggplant parmesan is really a bit like lasagna, with yummy layers of cheesy goodness.  Finely chop 2 cloves of garlic.

Add in a handful of basil, chopped, but save some for the top.

Add in about 7 ounces of part-skim ricotta.

And 1/2 teaspoon of red pepper flakes and one egg.  Stir together well to incorporate.

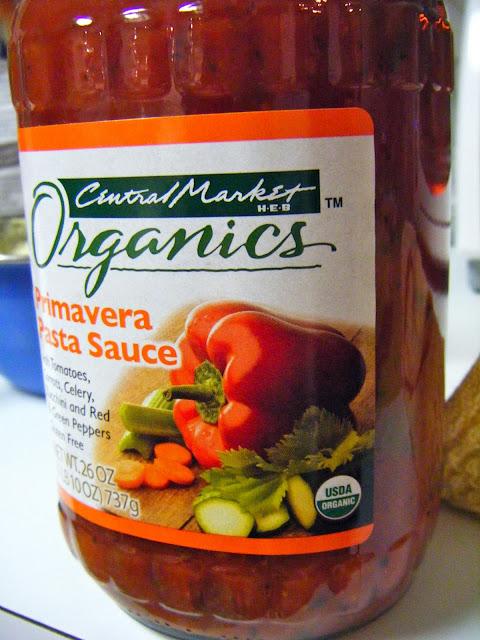
Your second sauce is easy-peasy: whatever old jarred sauce you'd like to use.  I had this one.  Okay, follow carefully: apply pressure to the top of the jar and turn the lid to remove.  I know, so difficult.  Take a little power nap after this if you need to.

Lightly spray a small baking dish (about 4''x8'' I think) with cooking spray and then put a layer of tomato sauce on the bottom.

Follow that with a layer of the eggplant and sprinkle with 1/8 teaspoon of salt (I call that a pinch).

Then add more sauce,

that yummy ricotta mixture,

and top it with a slice of mozzarella and a sprinkling of fontina.  Cheesy heaven!

Continue layering, ending with the tomato sauce on top.  Ignore mesmerizing Medusa stare of begging dog.

Bake in that toaster oven/oven for about 30 minutes, covered with foil.

(You go, toaster oven!  This is your moment to shine.  You're capable of so much more than toast.)

Then take the foil off, add a layer of mozzarella and fontina on top and let melt in oven for another ten minutes.  Top with torn basil.


Divine!  Toaster oven, well done, old friend.

Bon appetit!
lilrevchef

Sunday, October 9, 2011

sensational seasonal soup


Now, doesn't this just look like a big, warming bowl of wonderful?  It's sausage and broccoli soup (what Rachael Ray calls "stoup" as it's somewhere between stew and soup).  My memory of this soup is making it after being completely drenched by the typically chilly Northern Irish rain and my dear friend Andrea and I wolfing it down with big hunks of bread, only stopping eating to murmur "It's soooo good!" every few minutes.  This is not your ordinary out-of-a-can soup.  In fact, it's so special I wanted to make it for my sister and brother-in-law when I was visiting them last week as a little celebration of their 7th wedding anniversary.  So, whether you're feeling chilly (which in Texas, I'm not really) or wanting to celebrate an anniversary or an ordinary Friday, I highly recommend this big pot of love.  This makes a really substantial amount of soup (because I wanted Ash and Clay to have plenty of leftovers).


You'll need some of those divine San Marzano tomatoes.  They do cost about a dollar more than ordinary tomatoes, but as they're a huge part of this soup and have a delightful sweet flavor (instead of the sometimes overly-acidic flavor of other canned tomatoes), it's worth it.  You'll need a 28 ounce can, and don't worry if you can only find whole tomatoes instead of crushed.  They usually only come whole, but are easy to break up with a wooden spoon in the soup.

 Take three cloves of garlic, finely mince them and also finely chop one medium onion.

Brown 3 links of sweet Italian sausage and 3 links of hot Italian sausage (taken out of the casings) in a little bit of olive oil.  You'll want to use a wooden spoon to break up the sausage as it cooks.  As I don't think terms "rare" and "sausage" go very well together, I cooked it well, about 15 minutes on medium-high heat.  About halfway through cooking, add the chopped onions.  In the last 5 minutes or so, add the garlic, too.

Add about 1/8 teaspoon of freshly grated nutmeg (it adds amazing depth to this soup).

Then add in those sublime San Marzanos and use that handy wooden spoon to break them up.

 Get your broccoli ready.  Rachael's recipe uses broccoli rabe (which you have to blanch first to get rid of bitterness), but when I've made this I just use broccolini.  You may be thinking that's a typo, but that extra syllable's on purpose!  Broccolini is sometimes called baby broccoli or Tenderstem broccoli, and it has delicate little florets and stalks that are tender and yummy, too. Trim the broccolini into bite-sized pieces.

Now, we need to get a bit more liquid in that delicious pot.  Add in one container or chicken stock (about 4 cups).  I use boxed stock because making my own stock just seems like a lot of trouble.  

 Also add in about 2 cups of water.

This fabulous soup has pasta in it too (go ahead, do a little happy dance).  I used this campanelle pasta, because it's just so gosh-darn cute.

 Adorable, right?

Once that sumptuous soup is simmering...

 ...add in the broccolini...

 ...and the pasta.  Also add in one can of cannellini or great northern beans.  They add a Tuscan creaminess to the soup.  Let it cook until both the broccolini and pasta are al dente (about 6 minutes or so).

While that was cooking, I made some garlic bread Ina Garten style.  Ciabatta bread is best for this.

Finely chop together three cloves of garlic and 1/4 cup of parsley.  You could use a  food processor but I used an antiquated contraption called a knife. Season it with a little salt and pepper.  Heat 1/2 cup olive oil in a small saute pan and add this mixture, then turn off the heat.  Cut the bread in half and spread one side with 2 tablespoons of butter and brush the other side with the garlic herb oil.  Wrap in foil and bake at 350ºF/176ºC for ten minutes, opening the top of the foil halfway through.  Yum, herby, garlicky.  YUM.

Once the pasta and broccolini are done, add a bit of parmesan cheese (1/4 cup or so).

 Your heart just skipped a beat, didn't it?  So decadent and hearty.


Top each bowl with a little more parmesan, grab some of that herby crusty bread and enjoy this earthy, hearty bowl of joy.

Bon appetit!
lilrevchef